|
❈ Ever Wonder How We Constructed a Writing Slope?For those of you have been wondering how we did this, please note that there are no plans, as Dan built each of these writing slopes from his head, not from paper. We have taken a few pictures of the process. This page is not intended as a complete instruction guide on how to build and assemble a writing slope. Our intention is to show how some of the parts are cut and routed so that the pieces and parts fit together. Plus we offer a few notes on the finishing process further down the page. Also note that we are not building writing slopes any more, as we have retired.To see finished project ... scroll down ↓ |
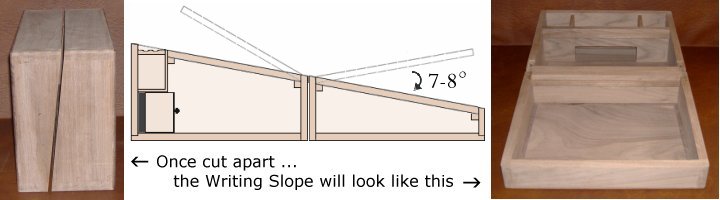 |
| At this point, the interior compartment parts are in place, the lid, base and sides have been glued in place. We then cut the entire box apart, at a precise angle, using our JET bandsaw. See a breakdown of the parts below ... |
❈ This Writing Slope was designed with Finger Joints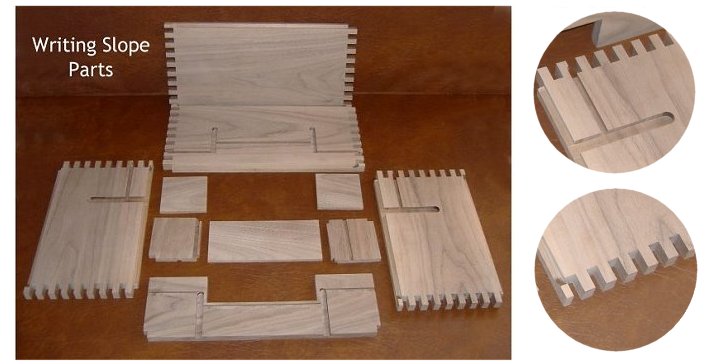 |
❈ Pieces and Parts for the Inkwell & Pen Compartments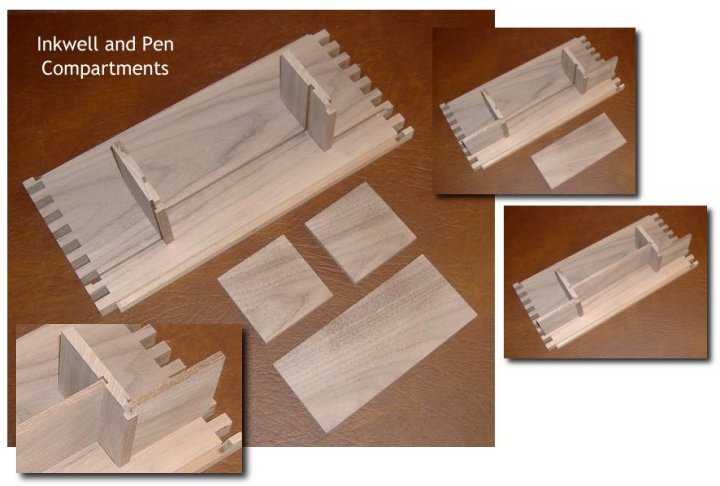 |
❈ Slots are Routed for Proper Fit and Placement of the Parts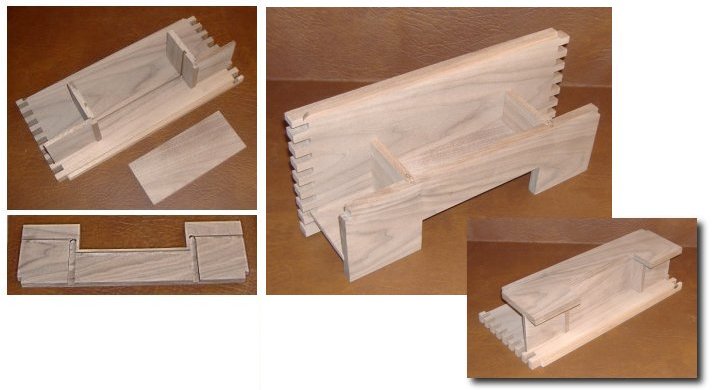 |
❈ Fitting the Sides to the Back Compartments(top & bottom not shown)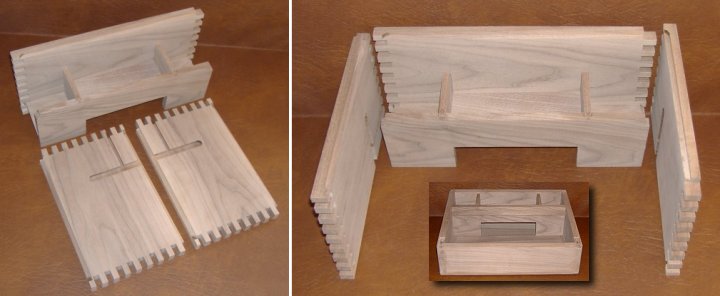
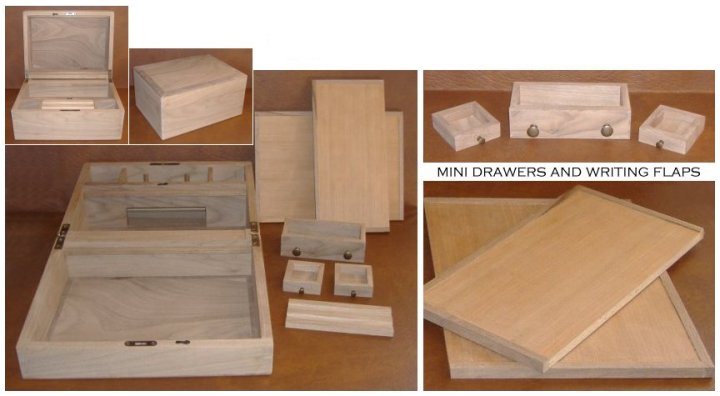
The other details such as drawers, panels, hidden compartments, inlays, pen cradles, etc should have already been intergrated into the interior construction prior to the glue-up of the sides. Each writing slope we build is unique in it's own way based on the clients specifications. |
 Message from Dan:
To determine the board height for all 4 sides, measure the height of your ink bottle, plus any compartments, drawers etc., under the bottles. Then add 1-1/2" - 2" to this number (this corresponds to the height of the lower end of your slope where the paper is stored). Now add an additional 1/2" (1/4" rabbet for top / 1/4" rabbet for bottom) and come up with the grand total. You will need to install the interior compartments prior to gluing the 4 sides together. Do not attach the top or bottom until the angle is cut on a band saw.
This angle is from the top of the bottle partition on one side to the absolute center of the opposite side (where the hinges are installed). There is no set degree angle. Each box is unique.
❈ Cutting the Angle on a 12" Bandsaw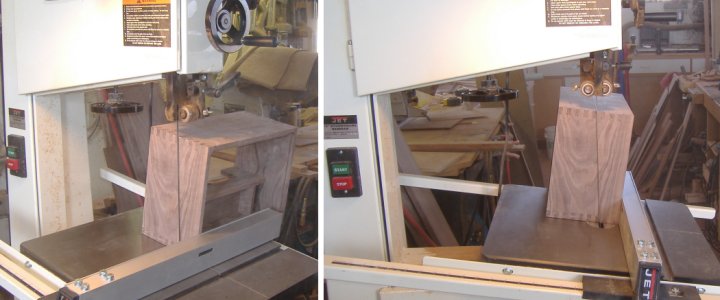 |
❈ Leveling Out Inside Box Surface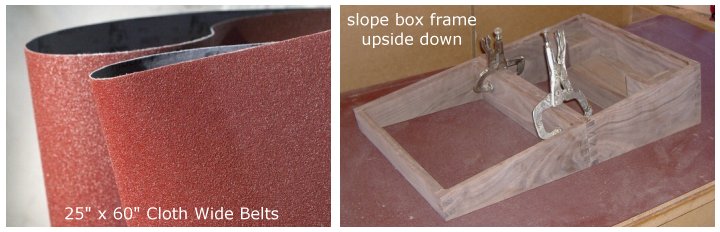 80 and 100 grit extra-wide sanding belts are cut and mounted (different grit to each side) to a section of plywood, creating a handy sanding table. With the frame upside down and clamped together, we rotate the surface edges to level out the inside surface of the box framework. We start with 80 grit first and then use the 100 grit. Once sanded smooth, the two sections of the writing slope box fit together without any gaps or flaws. 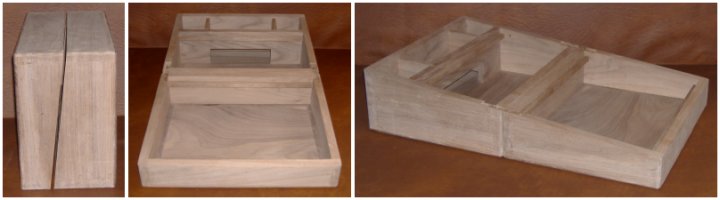
The lid and base are attached to the sides by using a rabbet cut on the edges. See this image to help explain. |
❈ Writing Slope is Ready for the Finishing Process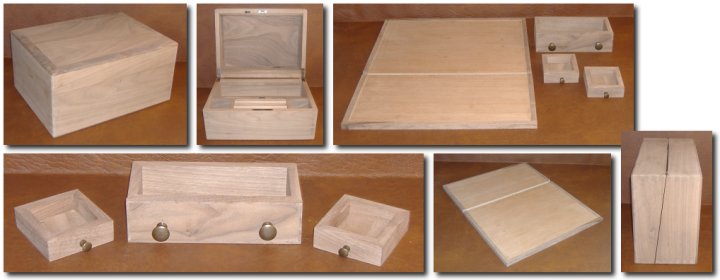
The pen compartment lid (aka pen cradle) is designed with two pen slots. All parts are now ready for the finishing touches. We use Tung Oil finish for the wood. It penetrates and protects the wood for years of use. If a time comes when the wood looks dull or gets scratched, a quick touch up using Lemon Oil does the trick! |
❈ The Finished Writing Slope
|
 |
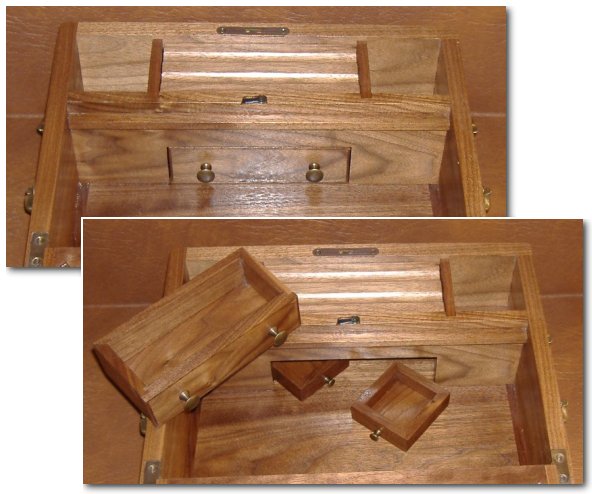
 The mini hidden compartments are
  The writing panels are made of veneer sheets trimmed with solid wood. Each is custom-fitted for the front and back compartments. Leather is glued down to the writing surfaces. The leather serves as a hinge mechanism, and are held in place using turn buttons. (There are no metal hinges on these panels.) See our tutorial on
 We have applied several coats of Tung Oil Finish to the wood. The client chose Blackberry Leather with tooling for the writing panels. Antique hardware, including desk hinges, bail handles and mini knobs are installed. Satin ribbons, tacked to the underside of the panels (for stamps, note cards, etc.), complete this project.